Photo booth

立体ハリウッドランプ Solid Hollywood Mirror​

1. だれでもブツ撮りできる撮影ブース / Professional Photo without Lighting Skills

撮影風景

影が一切落ちない/ No Shadow on Subjects

プロダクトの撮影では,被写体に影が一切落ちない照明セッティングに腕と手間がかかります。そんな面倒を省く「立体的なハリウッドランプ」を制作しました。全方位から光を当てつつ,直射光がレンズに入らない仕組みを,鉱物写真で用いる特別なプレパラート(クロスニコル)を転用して実現しました。

When it comes to promotional photography, it takes time to set up an environment that is shadow free.
If there is a light box that cast light on a subject from all corners and keeps rays from going into the lens of the camera, anyone can take a clean photograph without shadows.
Based on this idea, we started the “Solid Hollywood Mirror” project.
We were able to achieve the ideal light box by using crossed nicols.

2. 偏光板で空間をはさみこむ / A Pair of Polarizers Sandwiches the Space

偏光板の仕組みダイアグラム

Light source

偏光とは特定の方向にのみ振動する光のことです。本来光は全方位に振動していますが、偏光板を用いることで一定の方向だけの光を採光することができます。

また、直線偏光版を2枚用いて、縦と横の光をそれぞれ遮断することで、光を通さない状況を作り出すことができます。

Polarization means that the wave oscillations have a definite direction. Although, light waves originally vibrates in all kinds of directions, we can let light in a given direction by utilizing a polarizer.
In addition, blocking all lights is achievable when vertical and horizontal lights are cut off by using two linear polarizer.

3. 偏光板を用いた撮影台の仕組み / Mechanism of the PhotoBooth

偏光顕微鏡を立体に応用

偏光板の立体での応用により、自発光したブツ撮りの実現。


偏光板を用いた平面的な撮影は「偏光顕微鏡」として用いられていますが、このプロジェクトでは立体での応用を行いました。

Polarizer is used as a polarizing microscope for two-dimensional photography but for this project, we applied it for three-dimensional photography.

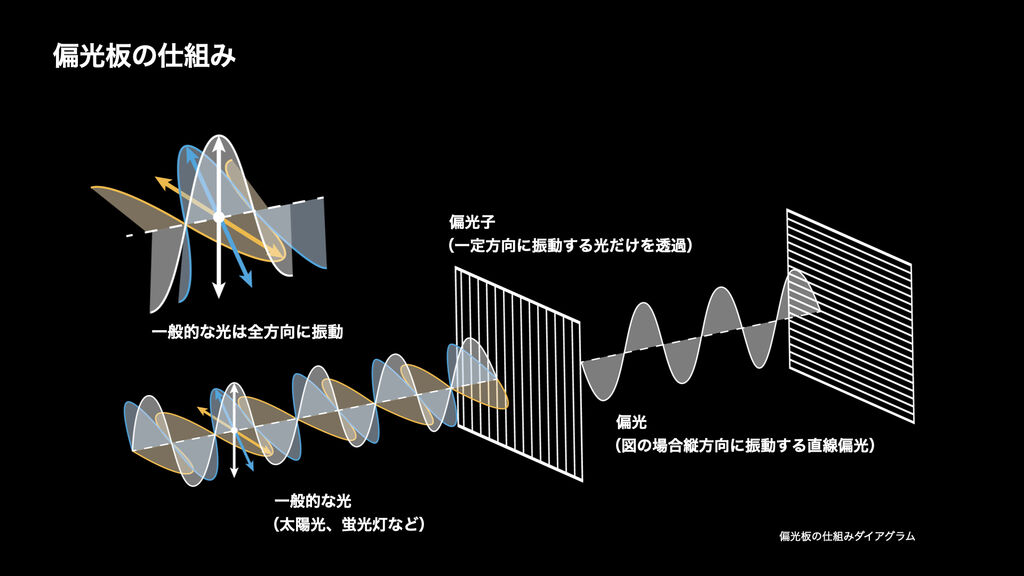
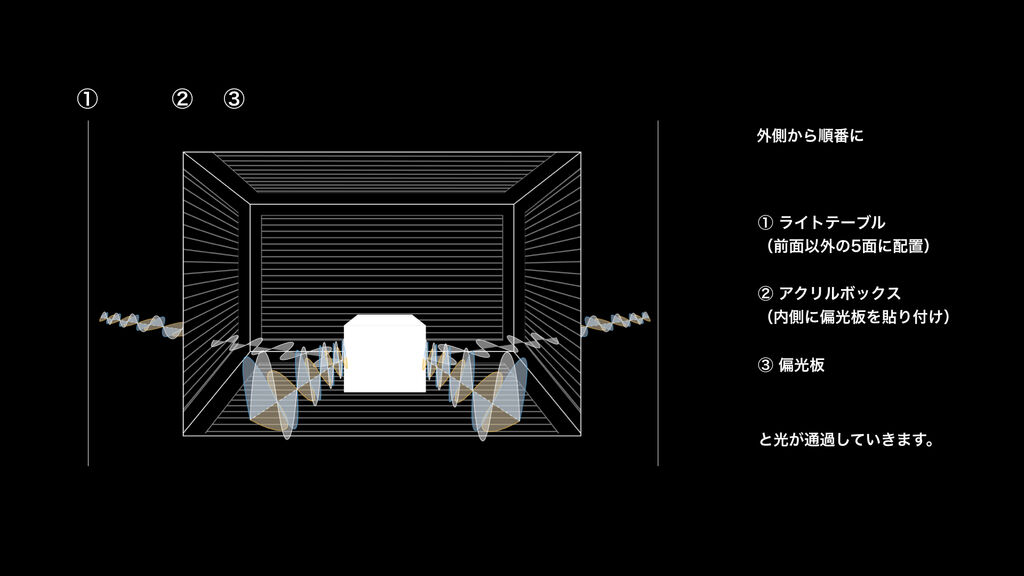
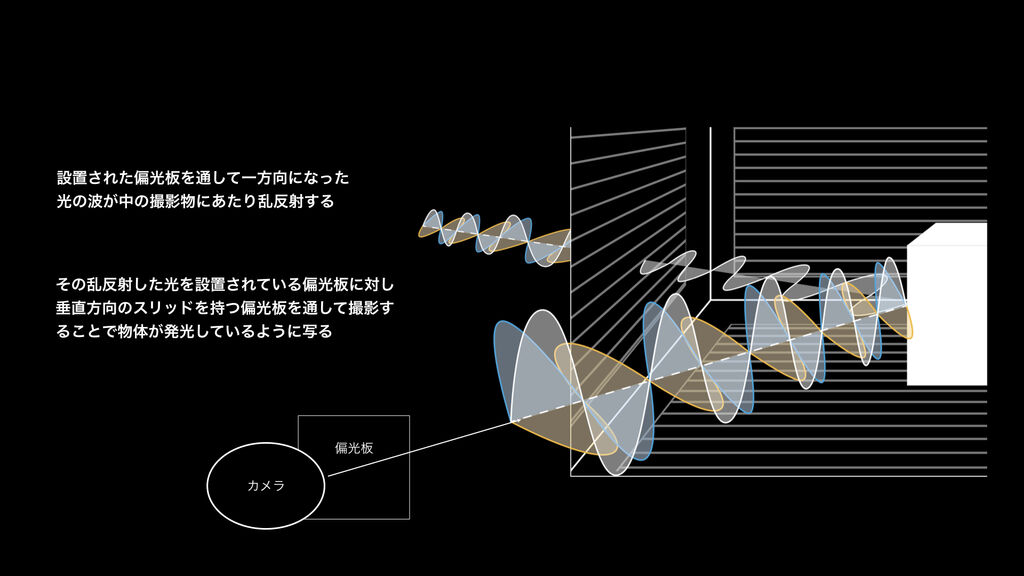
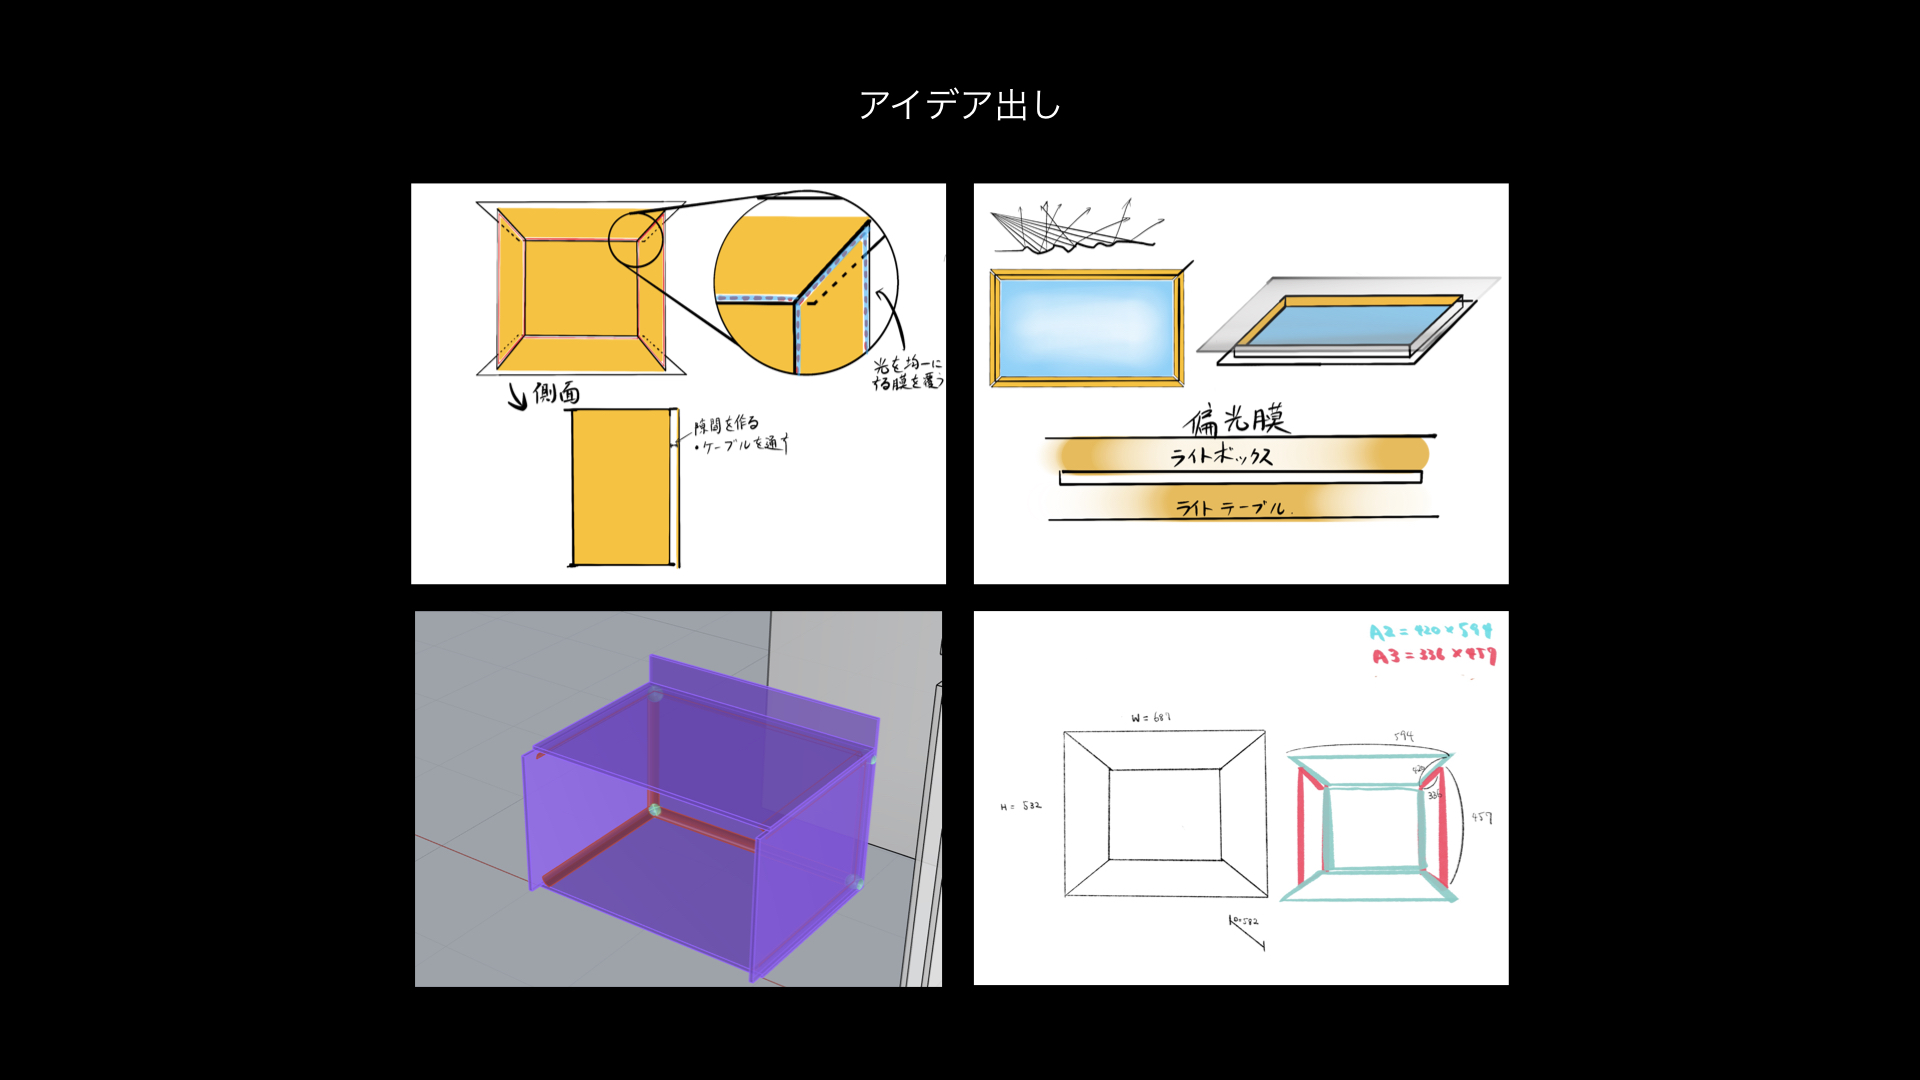
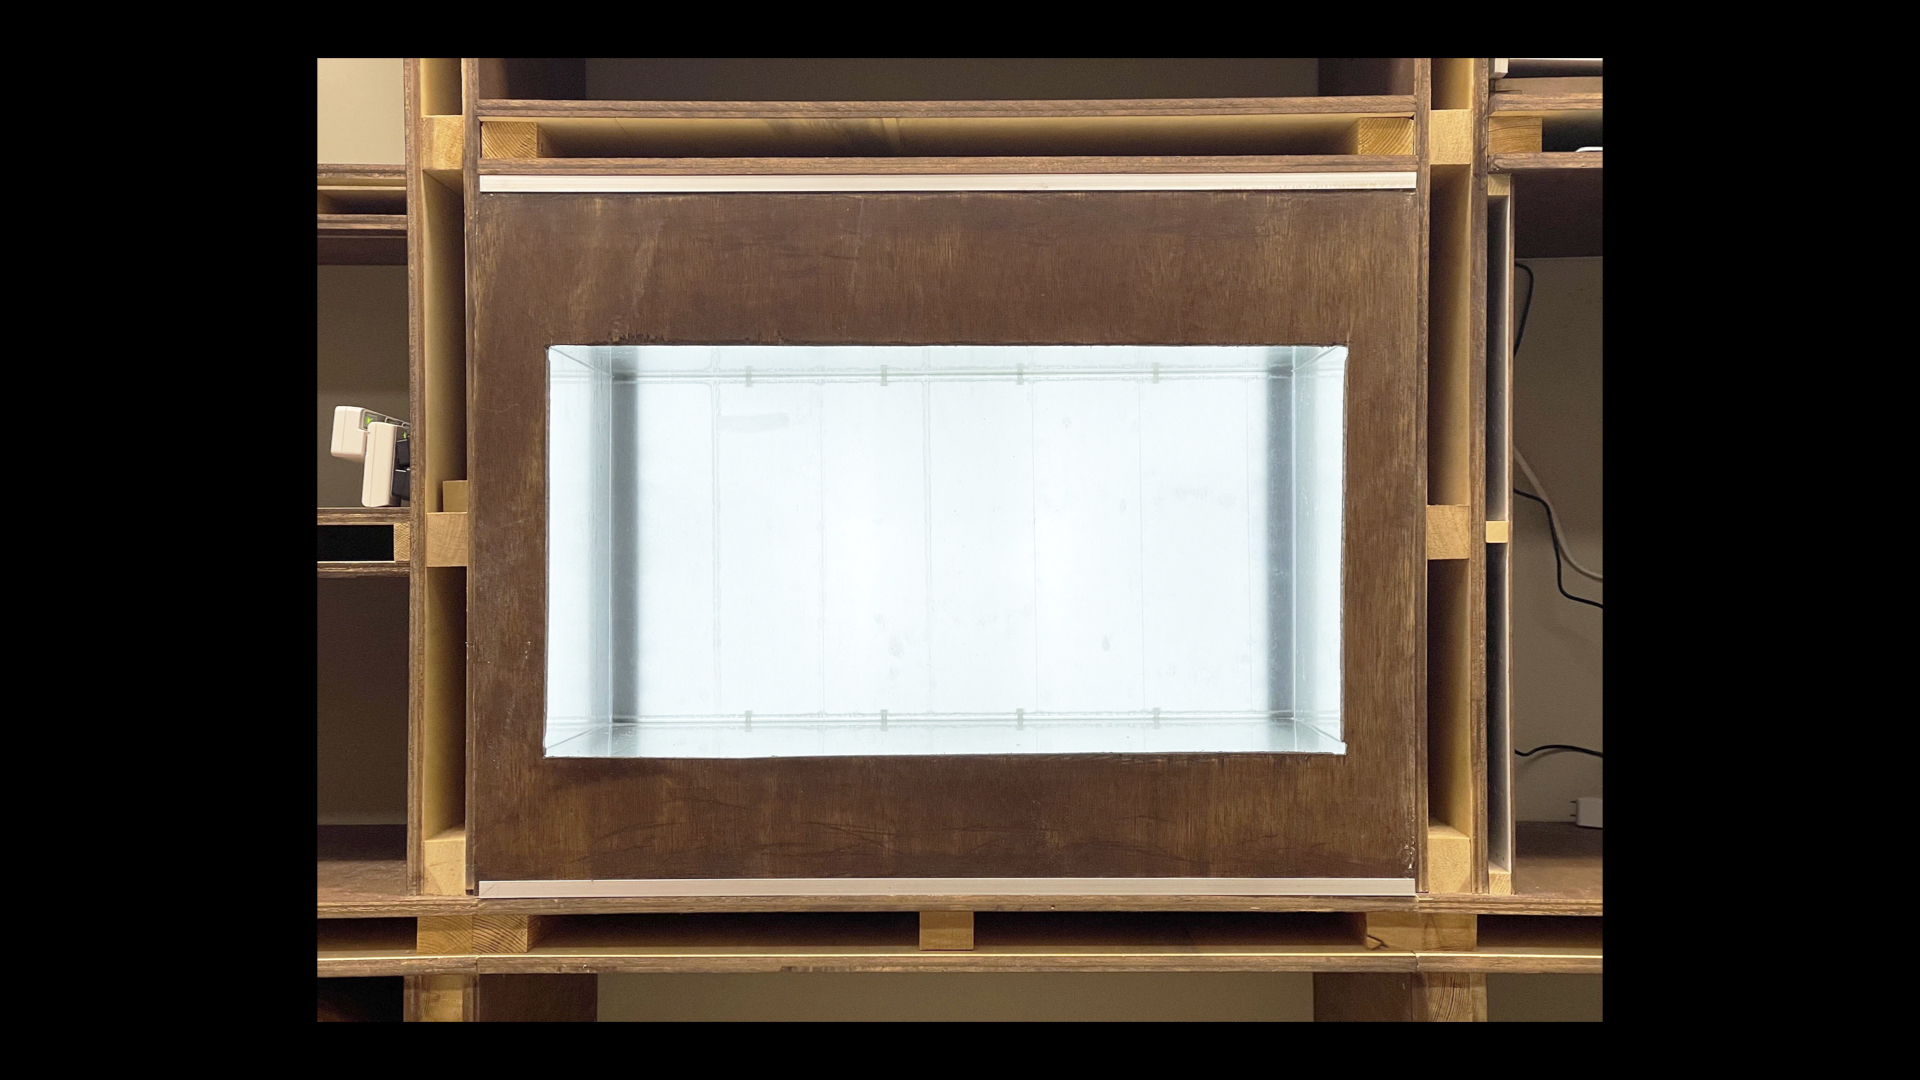
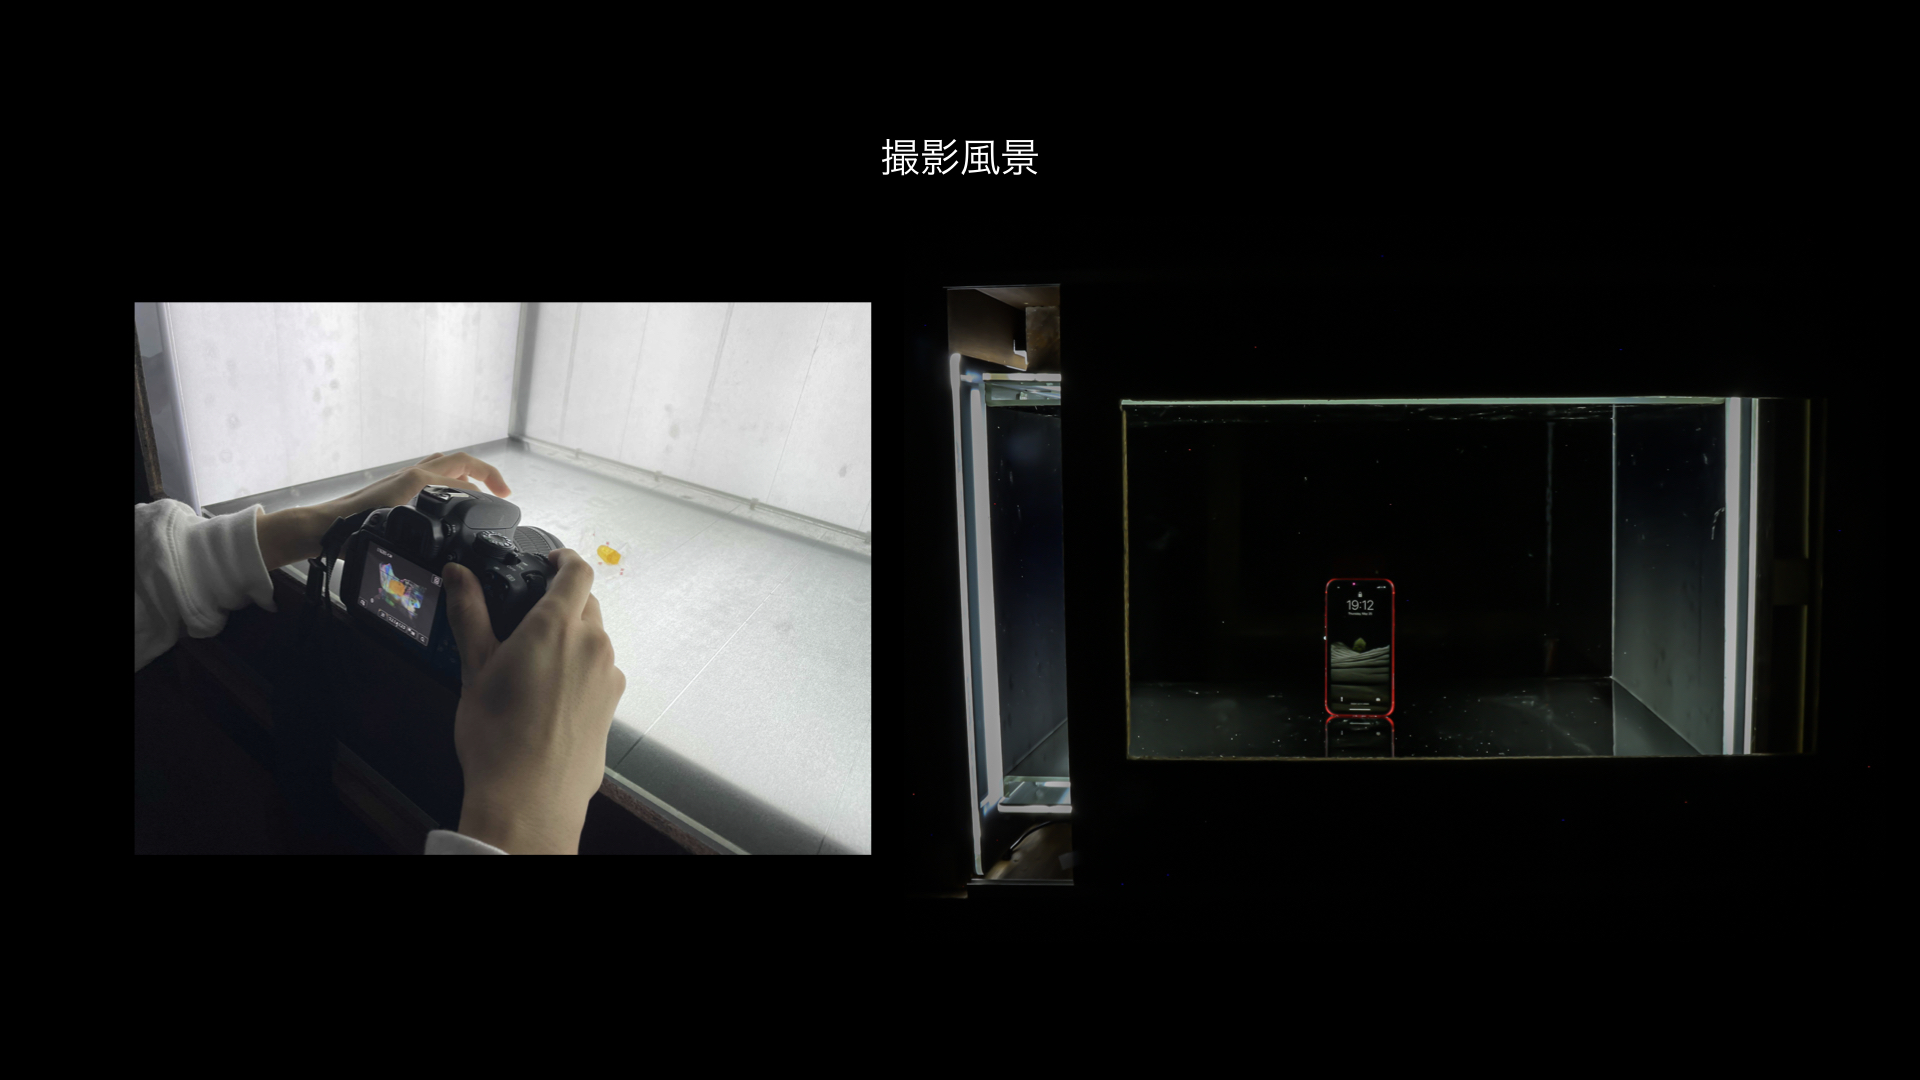
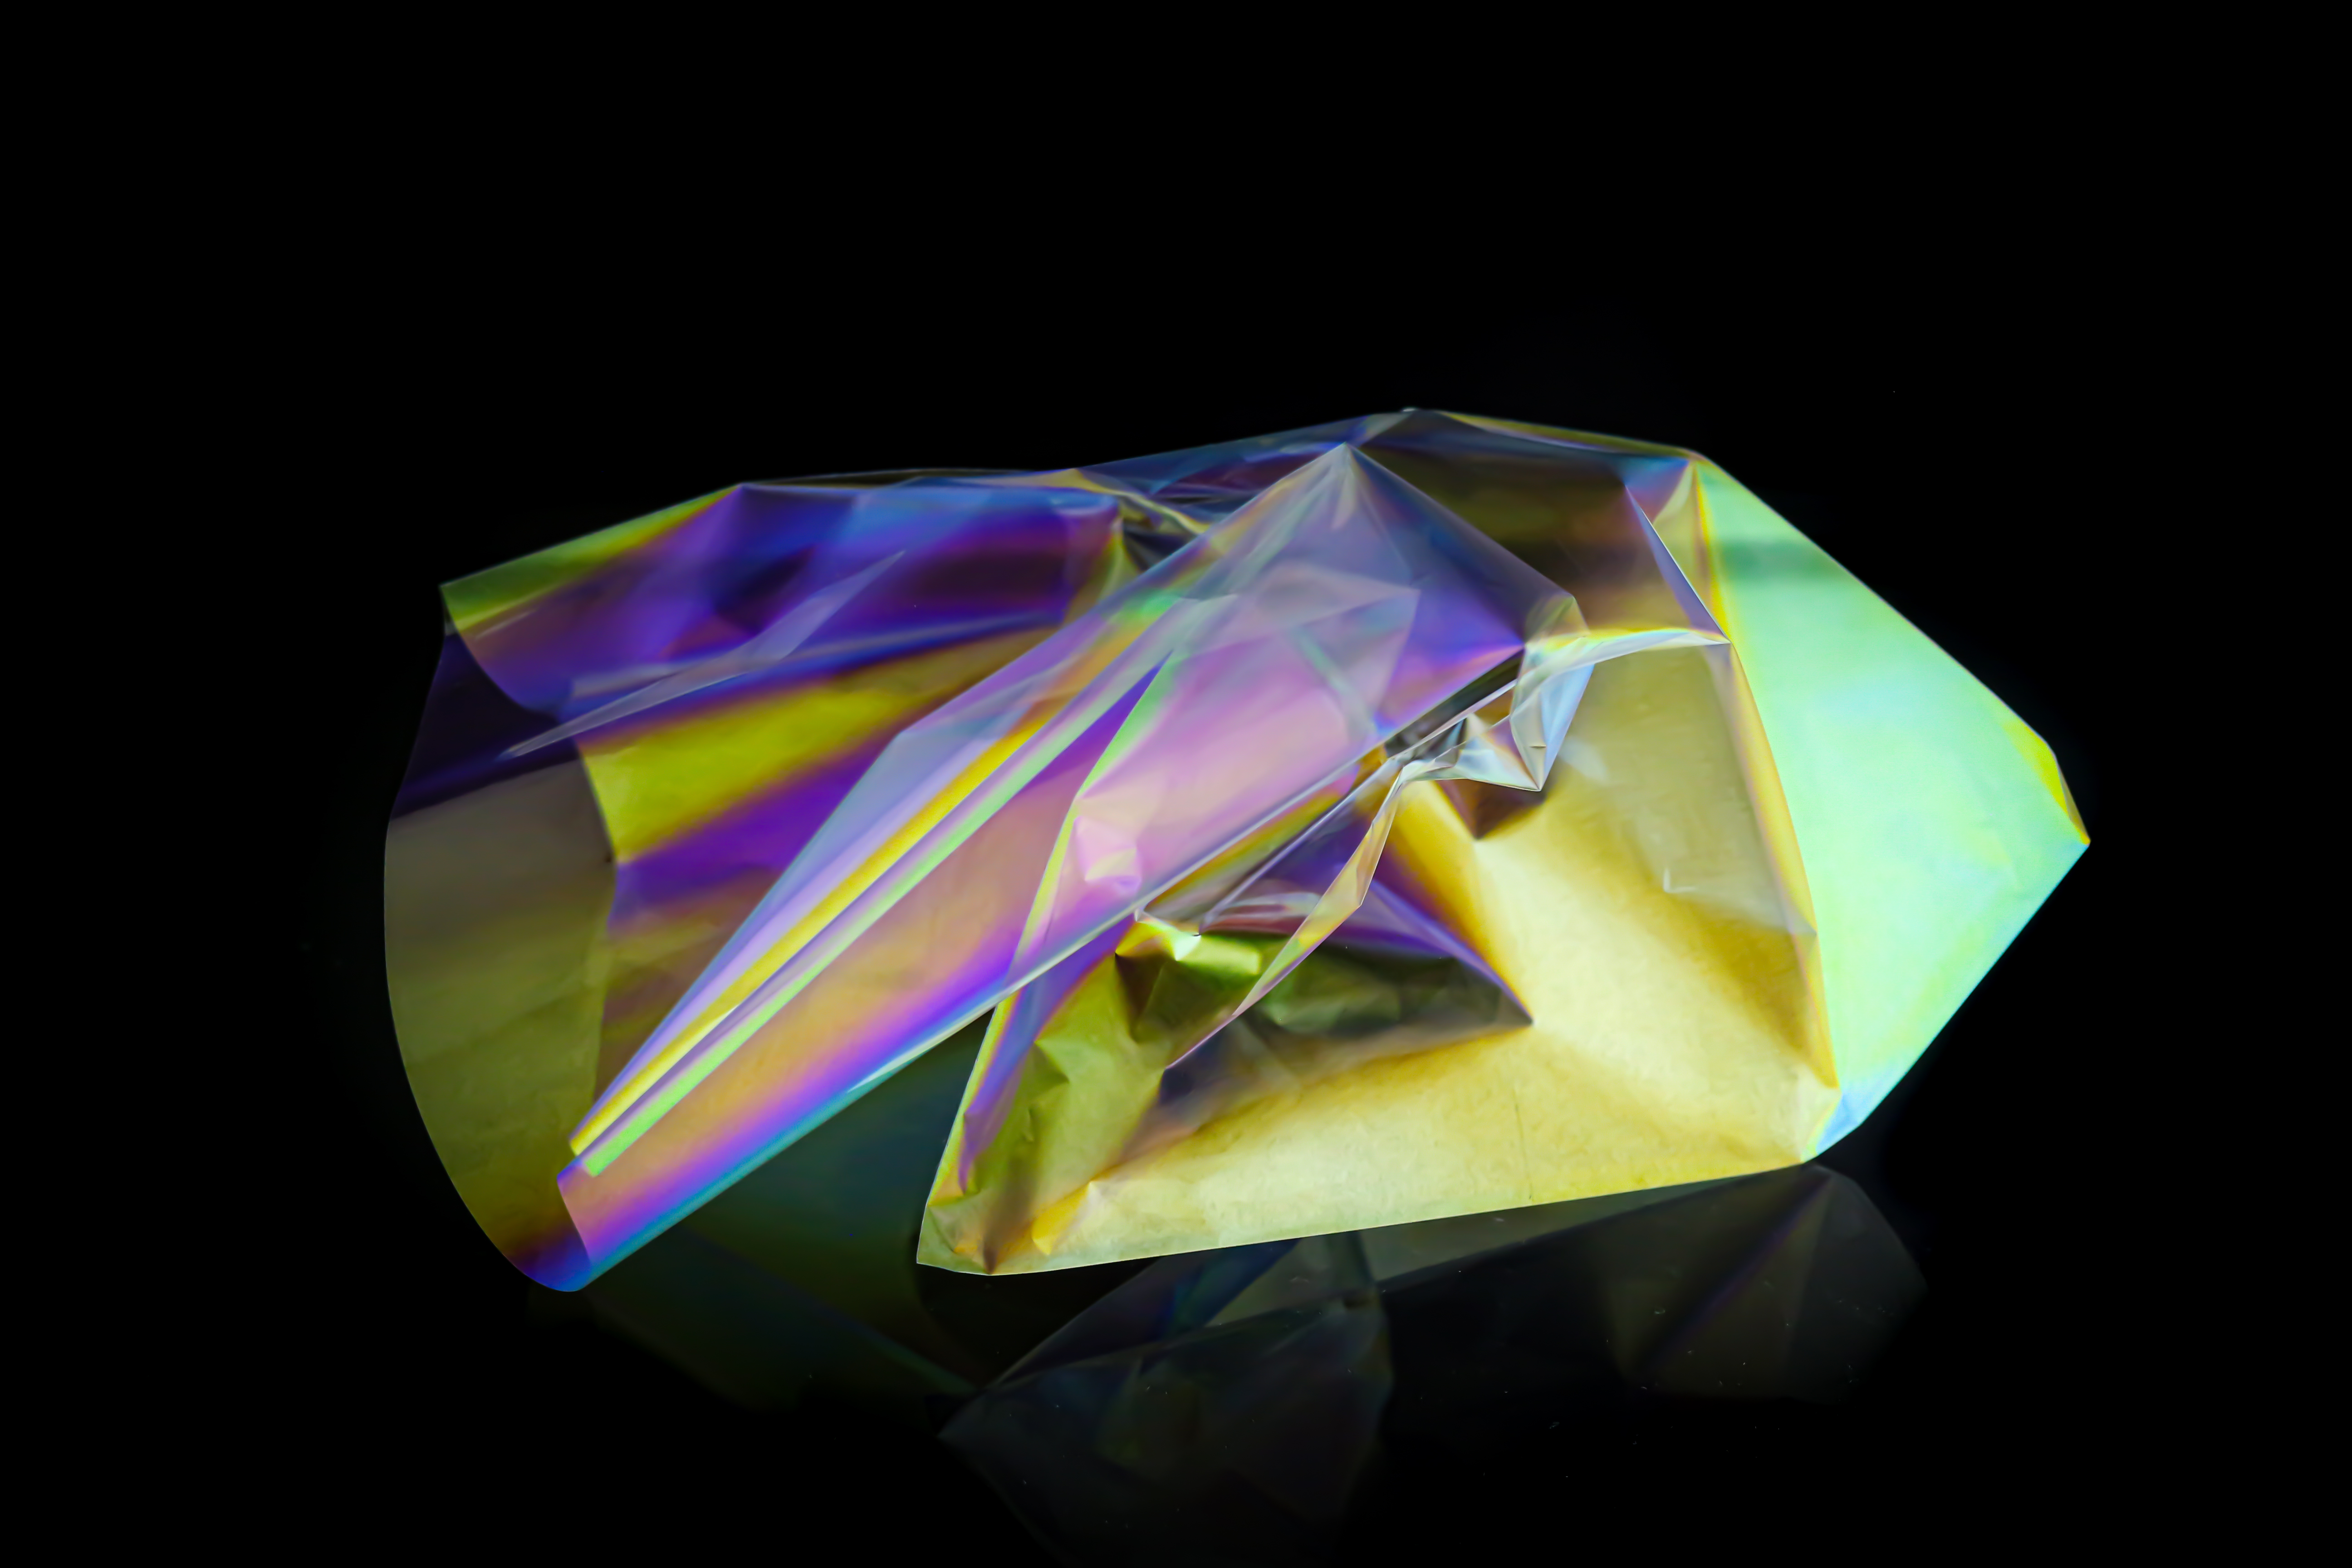
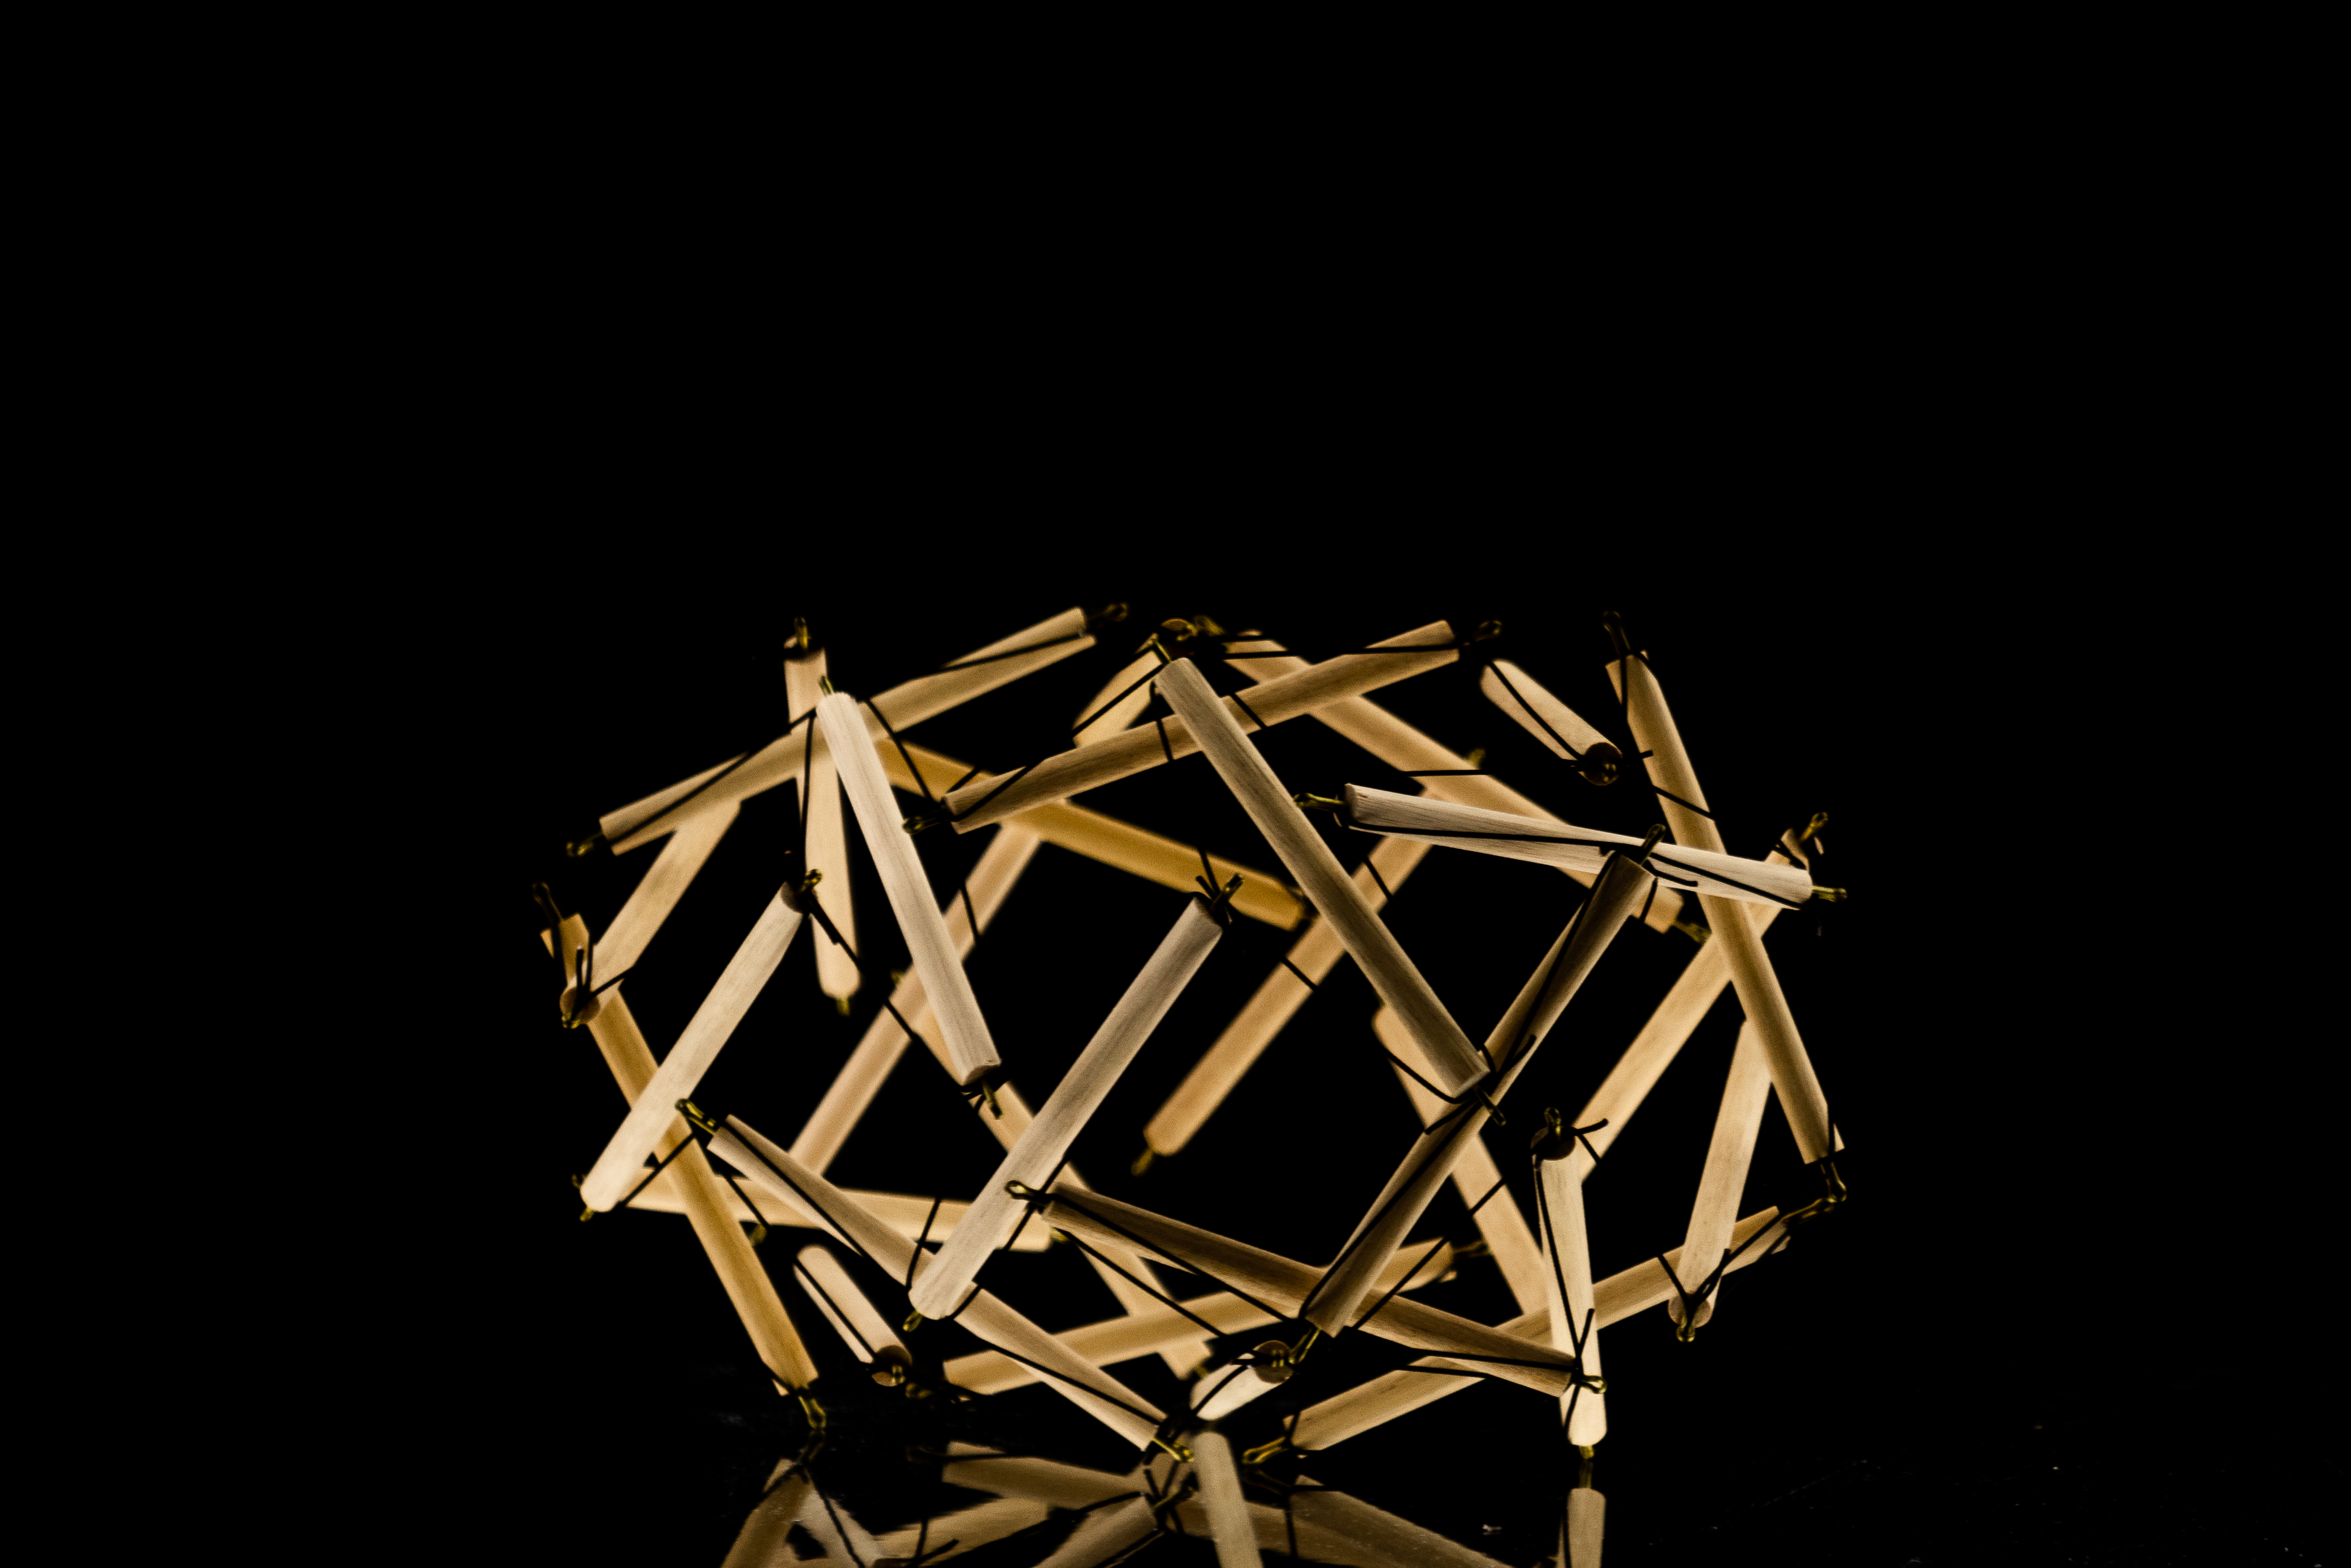
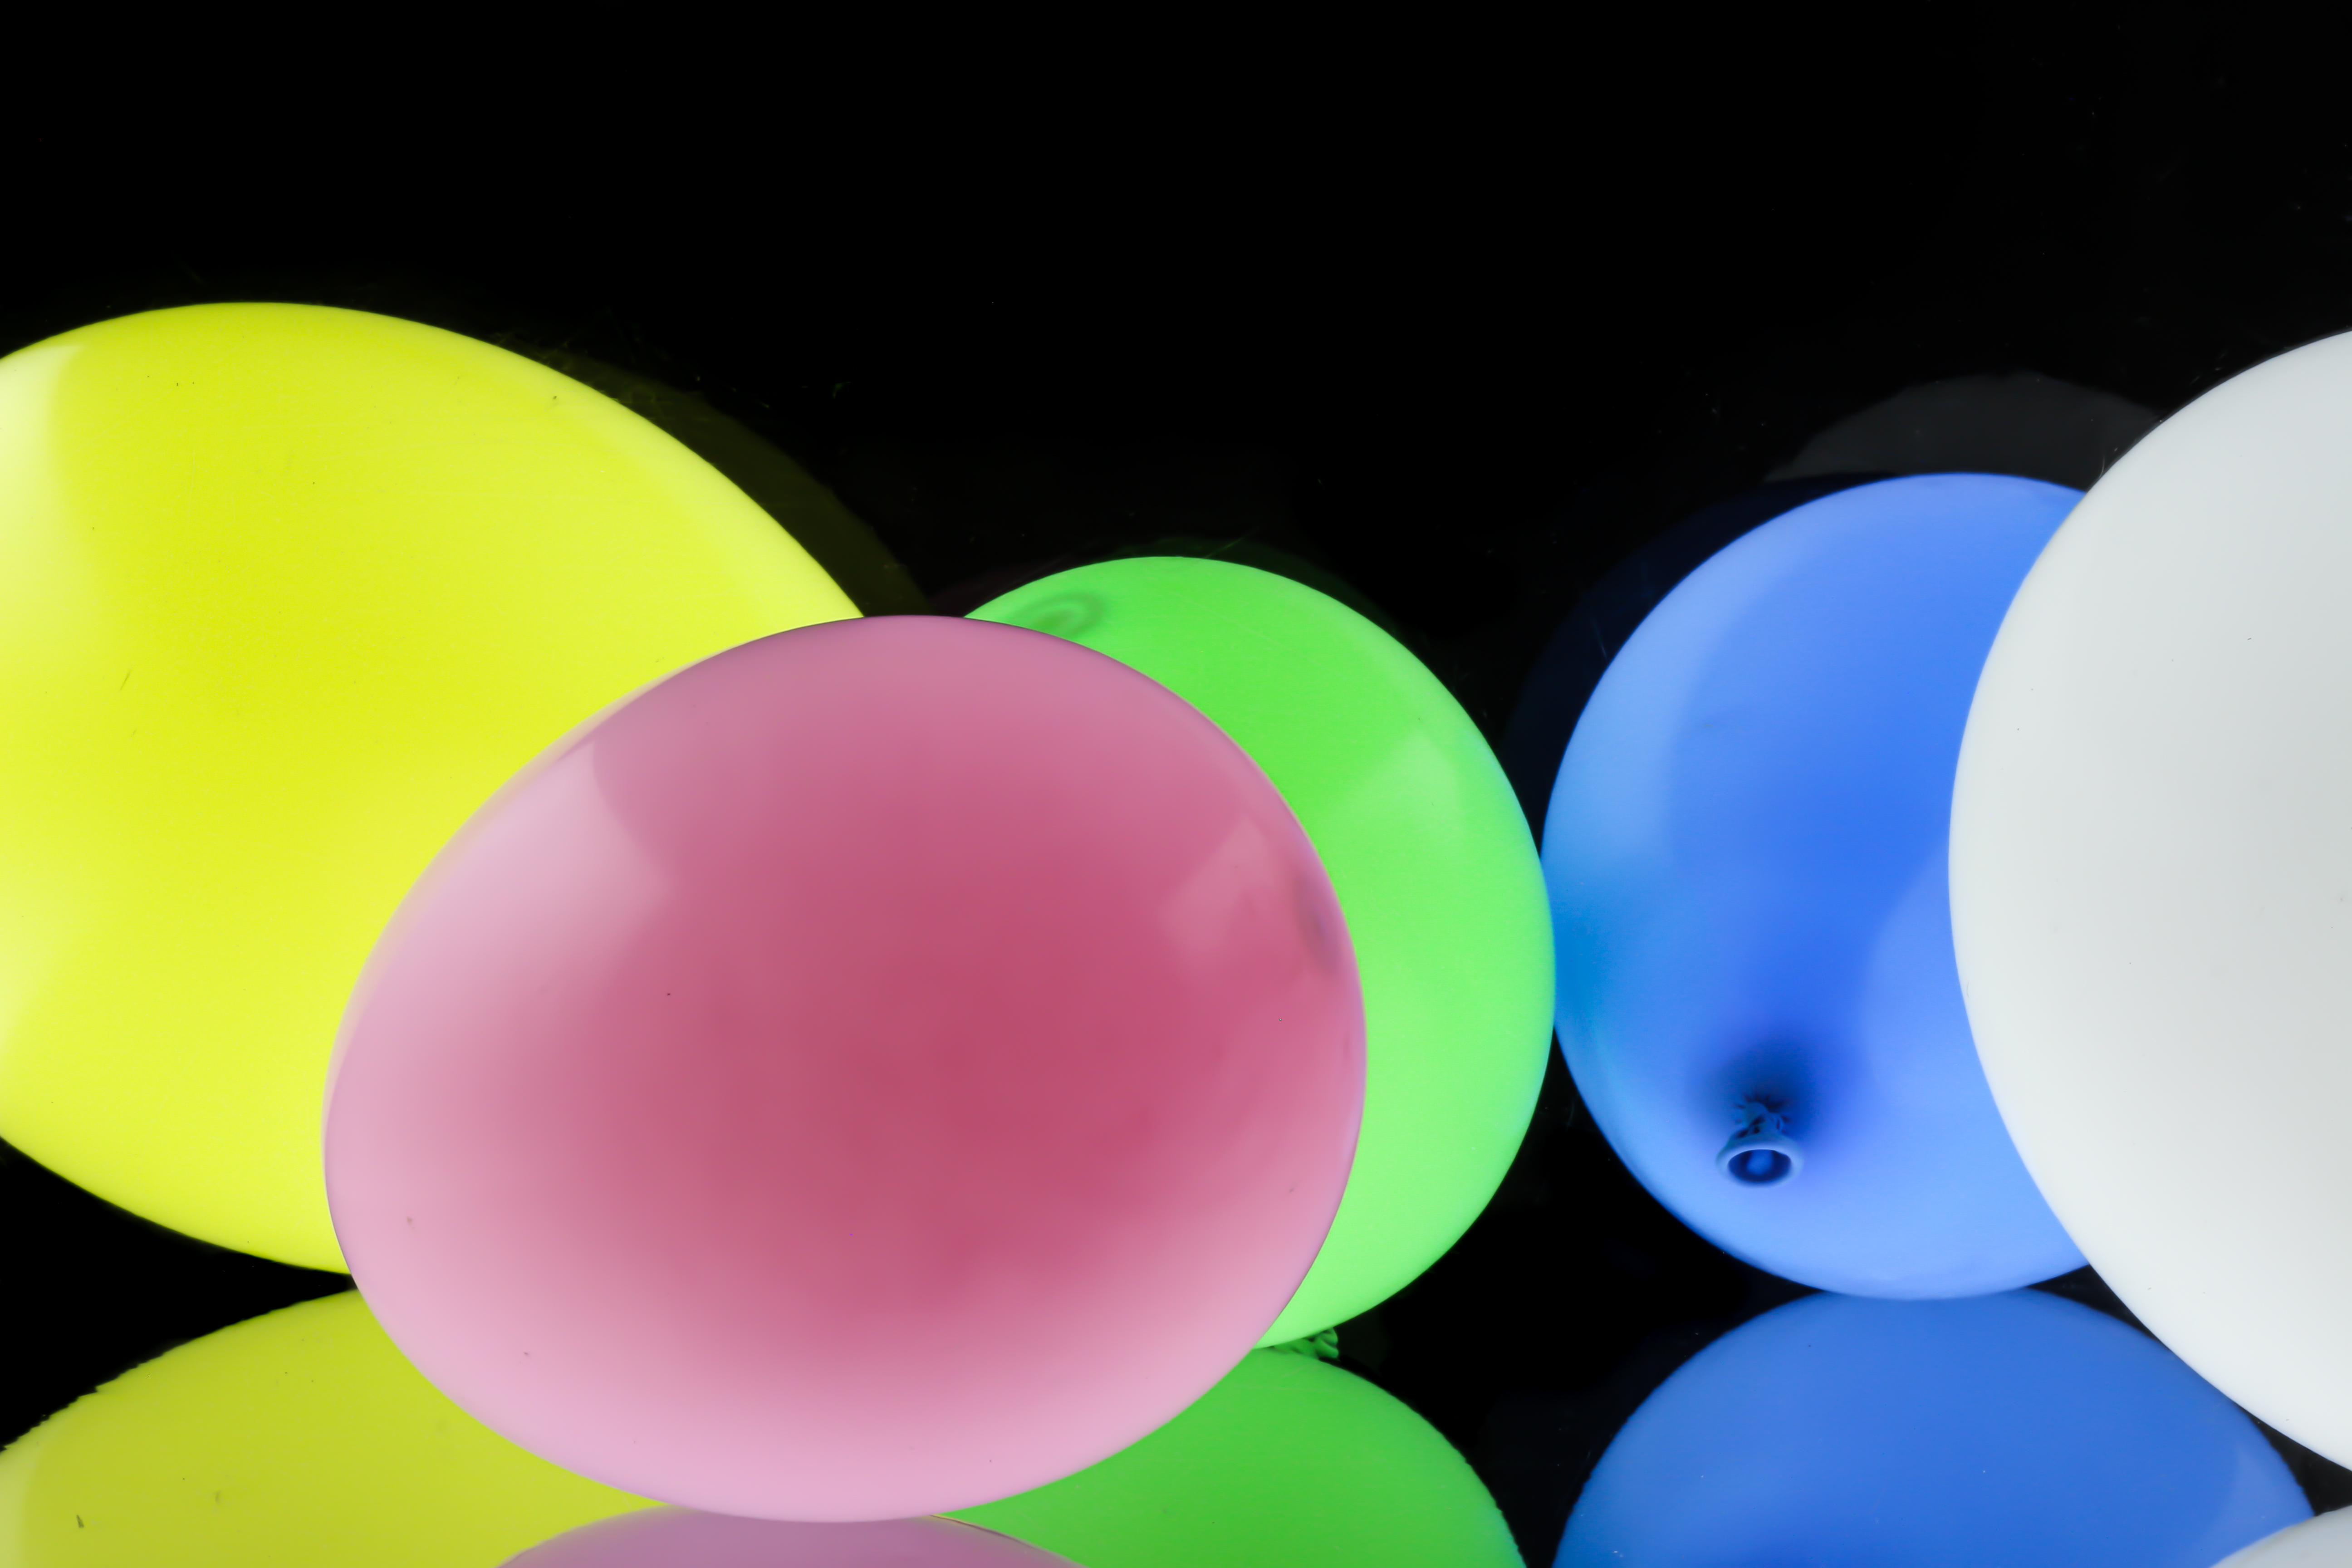
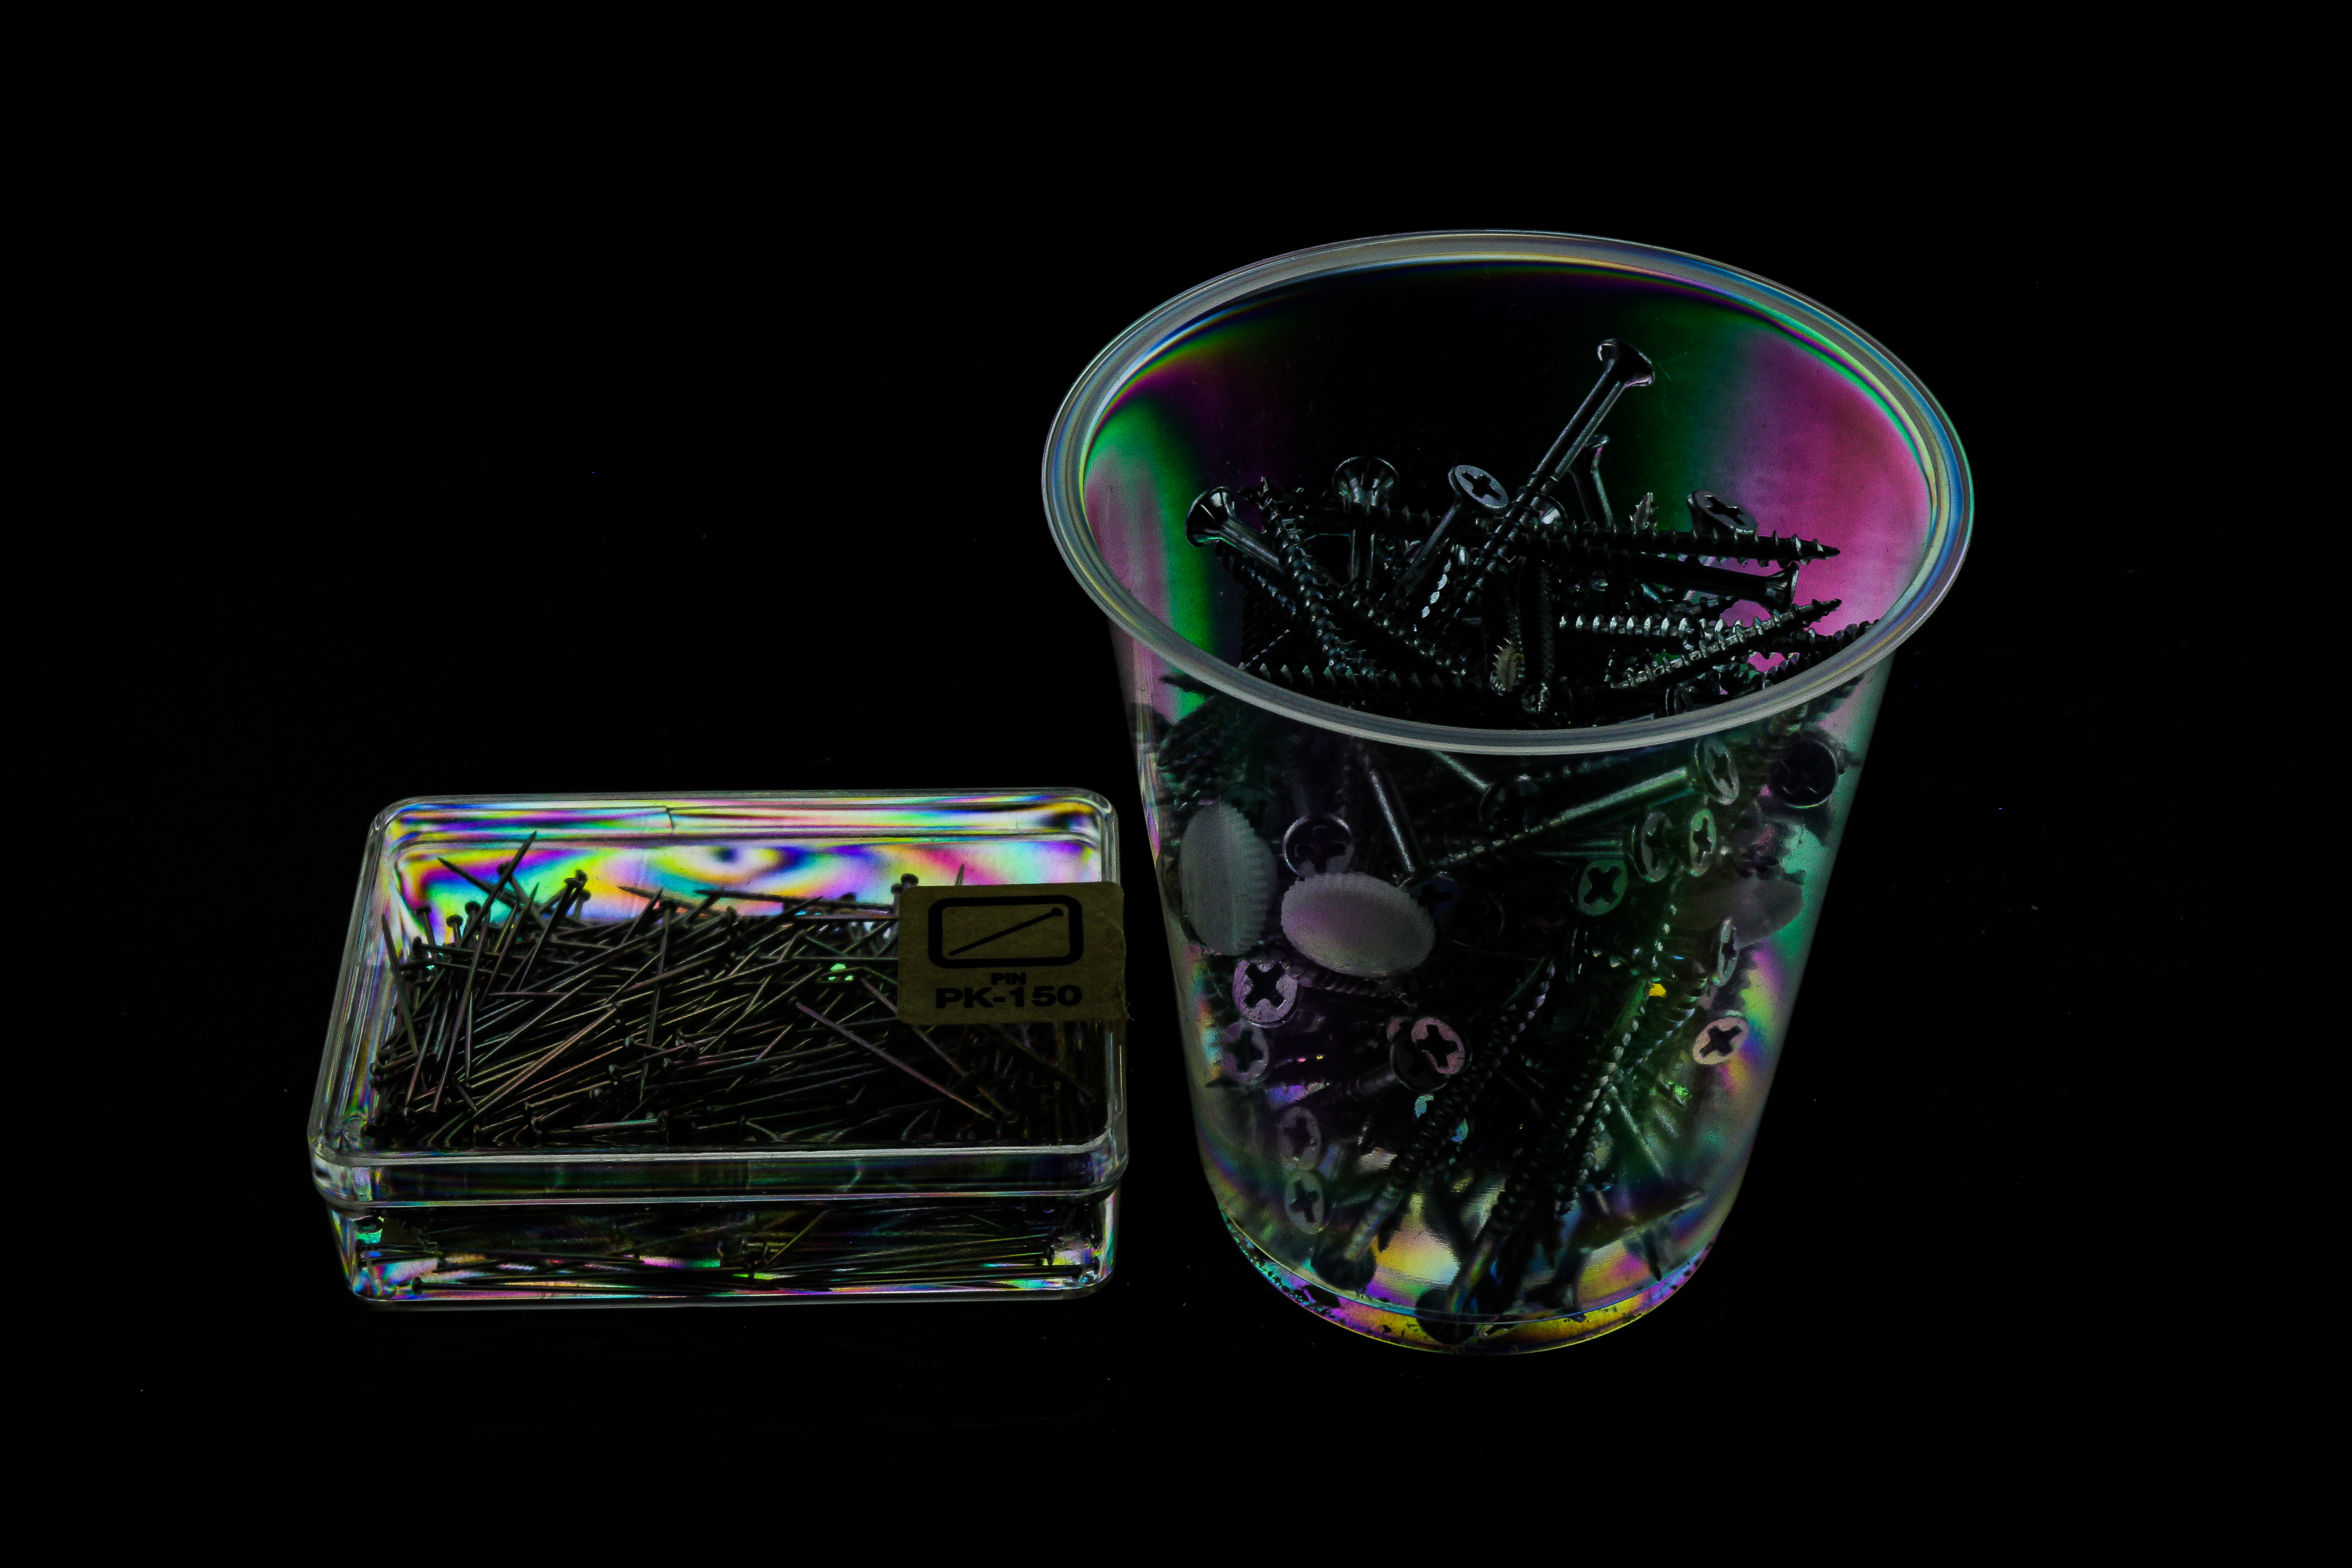
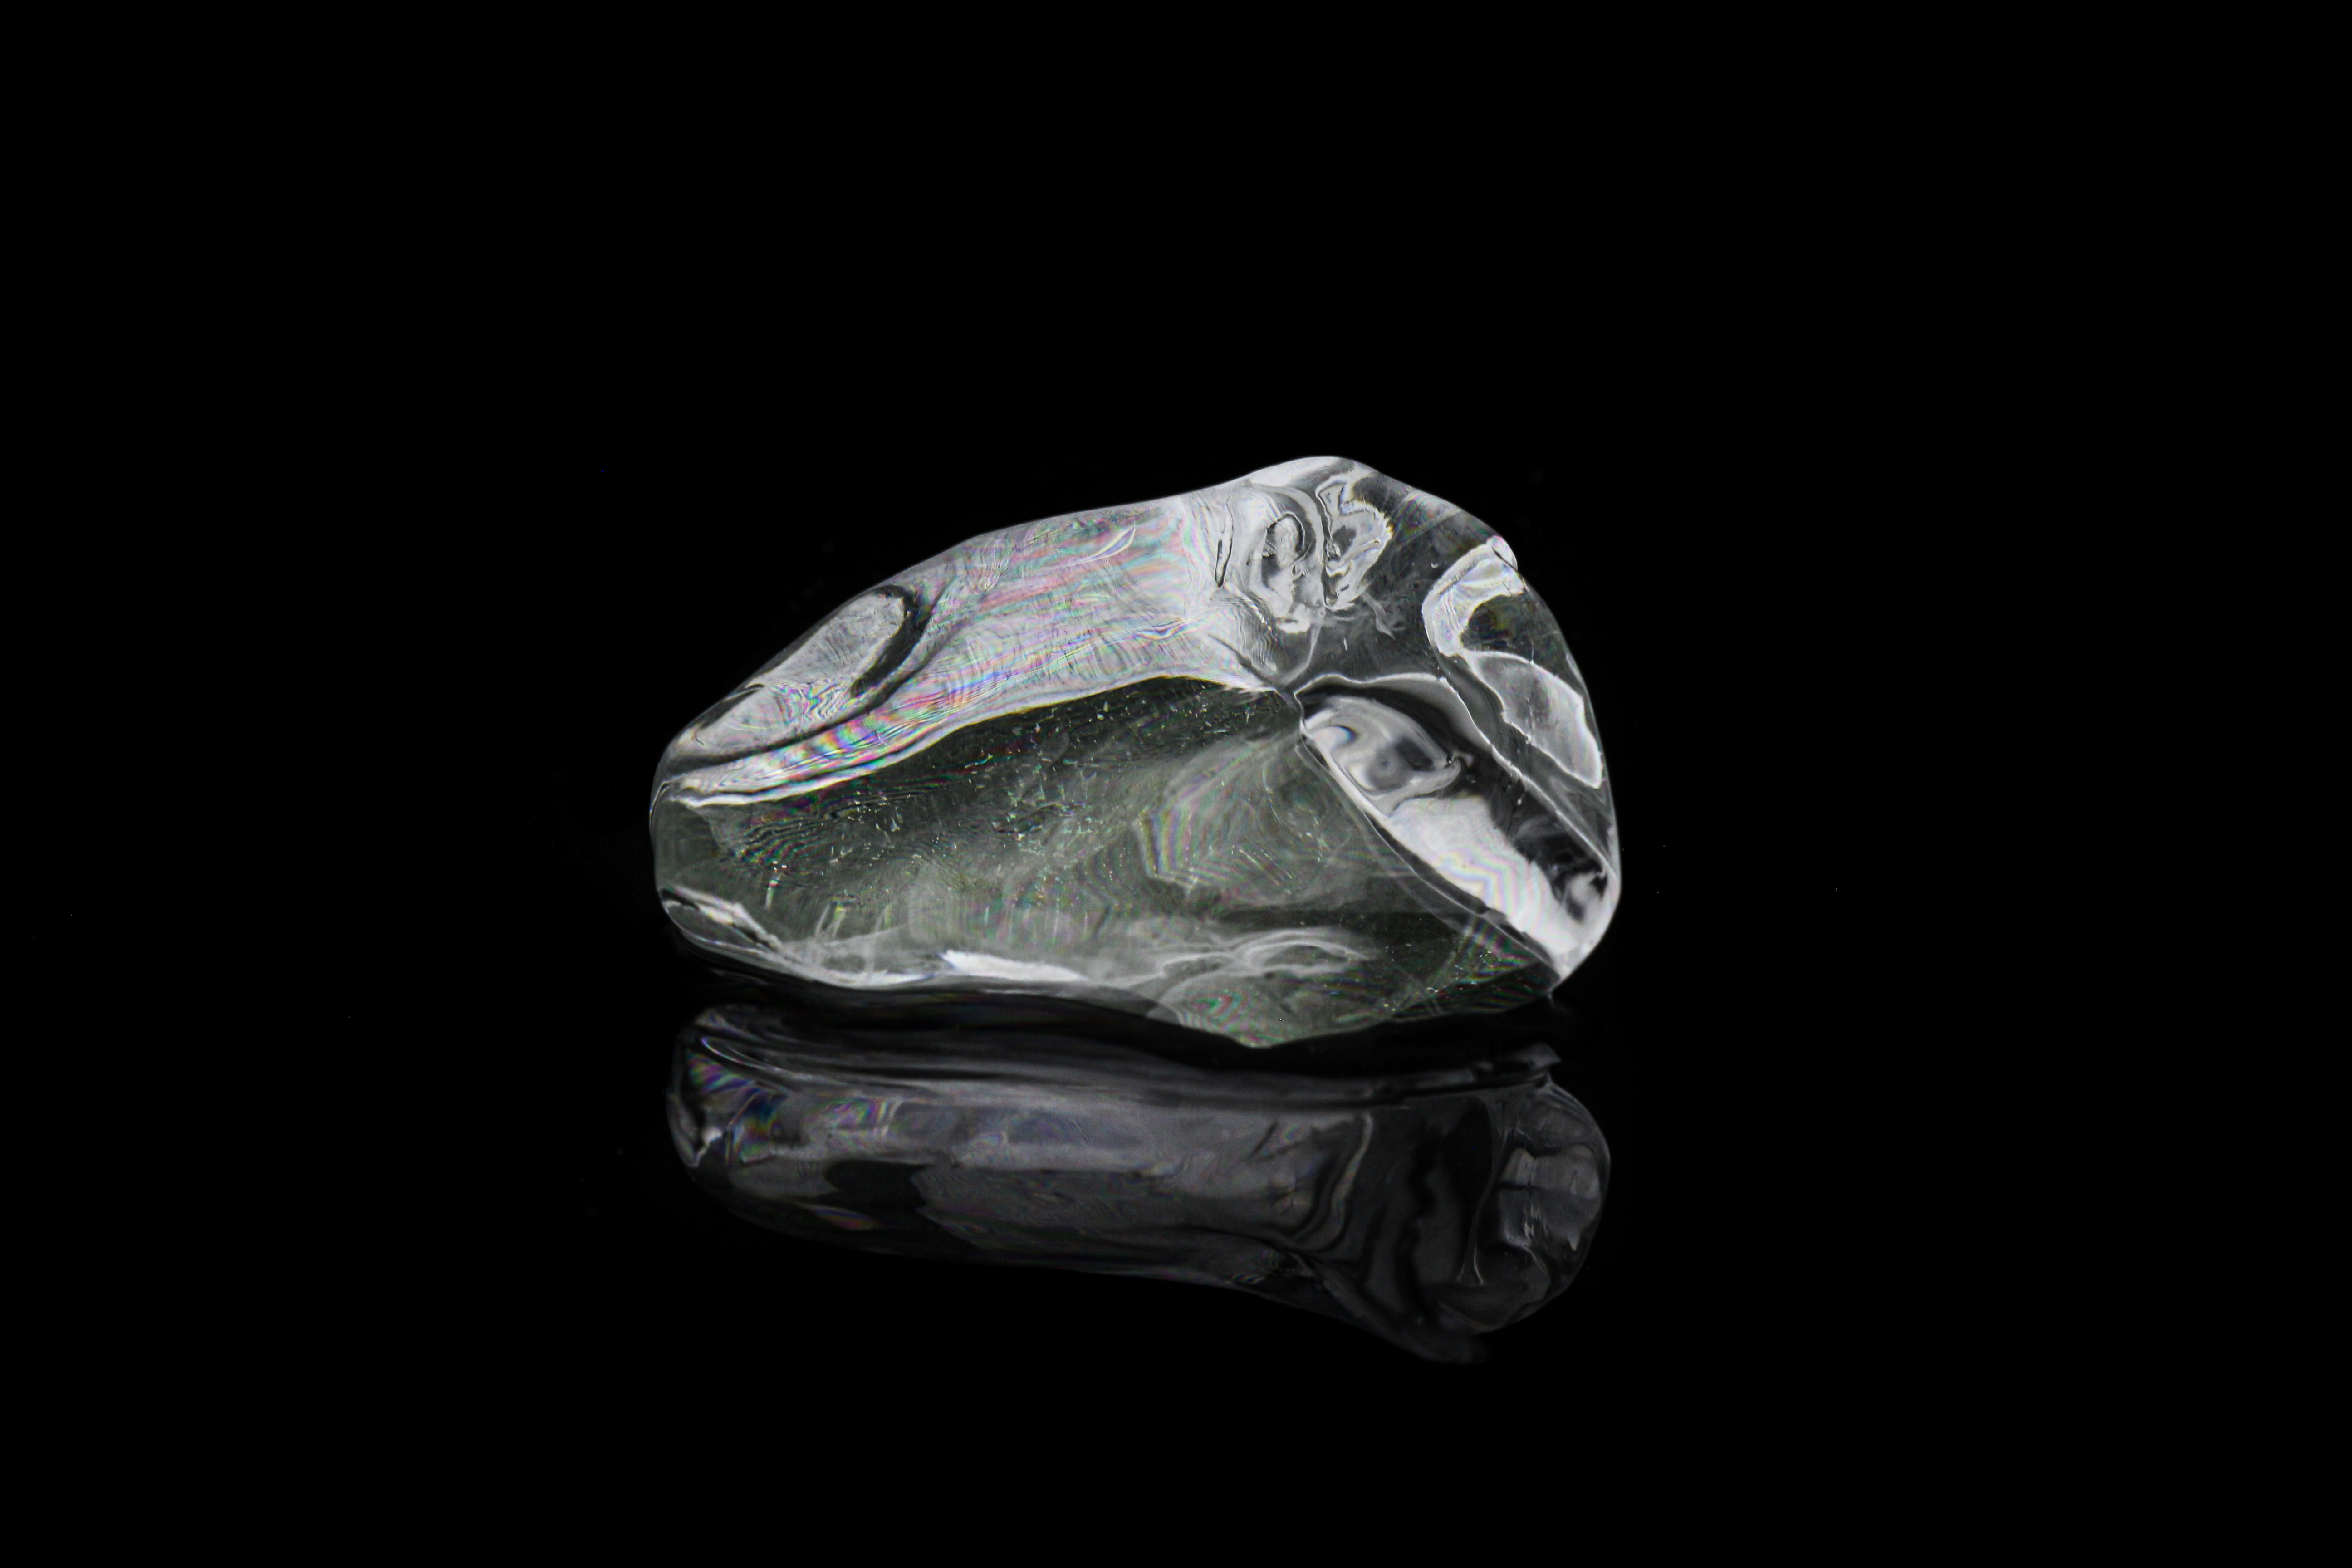
光を「ライトテーブル→アクリルボックス→偏光板」を通過させた上で5方向から当てることで、一定方向のみの光の振動が撮影物で乱反射します。

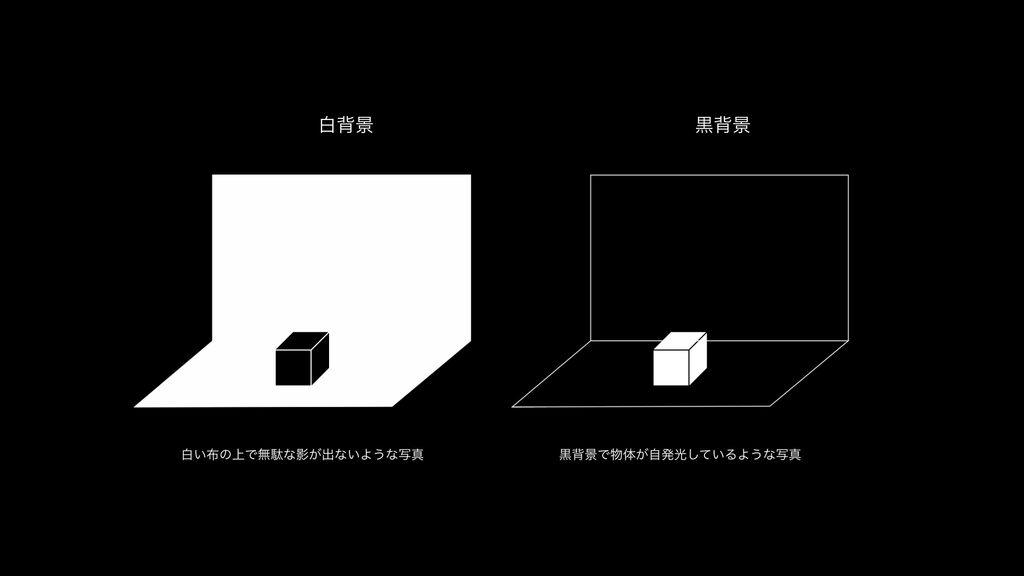
そして、その乱反射した光を設置された偏光板に対して垂直方向のスリッドを持つ偏光板を通して撮影をすることで、撮影物が自発光しているように撮影することができます。

By passing though the polarizing filter, the lights which comes out from the led panel will only vibrate horizontally. After being reflected by the object, the lights will start vibrating in different planes again. Accordingly, set a vertical polarizing filter in front of the camera would block those horizontal-vibrating lights, leaving only the light reflected by the object being taken by photo, which makes it looks like self-illuminating in a black backgroun

黒背景の特徴

従来の撮影台では、白い布を背面に置き全方面から満遍なく光を当てることで影を出さないような工夫をしますが、今回制作した撮影ブースでは、黒背景で物体が自発光していることで今までになく対象を際立たせたブツ撮りをすることができます。

In conventional photo booths, a white cloth is placed on the back of the booth to provide light from all directions to prevent shadows from appearing, but in this newly created booth, the object is self-illuminating against a black background, making it possible to take product shots that highlight the subject like never before.

4. プロセス/ Process

小型モックアップの作成 / Small mock-up

まずは小型で、偏光板の立体での応用かの検証を行いました。

We first made a prototype to make sure if the polarizer works properly in a three-dimensional way.

大きさと材料の調整 / Size and Materials


備え付けの棚に設置するということで、ぴったりはまる且つメンテナンス等のための出し入れが必要となります。まずは大きさにあったライトテーブルを確保し、偏光板を固定するためのアクリルボックスを作成しました。

Since we are using a shelf already made in Narukawa-Lab, we made sure the light table will fit perfectly and created an acrylic box to secure the polarizer.

完成イメージ図

固定具のスタディ / Fixture study


5面に設置されたライトテーブルを支えるために棚とライトテーブルを固定する固定具が必要になります。

強度やサイズ。電源タップの位置やコンセントの導線。既製品をどう生かすかを考え固定具の作成を行いました。

First, we made sure the size of the light tables, and started making a plastic box to set the LPL.

図面

制作風景、撮影風景

作成風景写真(材木切り出し→土台設営→完成)・完成外観・撮影風景

5. 撮影台で撮影された写真